When I got back into collecting I didn’t have the money to spend on the true card storage boxes (those you see with five rows and a cover). But I did some experimenting (and got lucky) and found a great way to build my own card storage system. Follow the steps below to create your DIY card storage system, and this is what you’ll end up with.
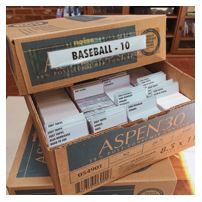
This is the DIY card storage you’ll end up with.
>>> READ MORE ABOUT ORGANIZING YOUR CARDS <<<
What You’ll Need to Complete the DIY Card Storage System
You’ll need a few things to get this done. Some are kind of optional or depend on what you are comfortable with. Your dealing with some sharp stuff so PLEASE BE CAREFUL! It’s easy to use a little too much strength and cut yourself. Here’s what you’ll need:
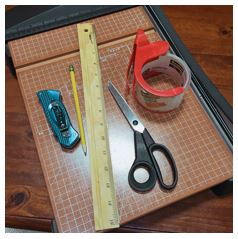
What you’ll need to complete this project.
- Scissors
- Ruler
- Pencil
- Packing Tape (preferably with a dispenser that cuts it)
- Optional:
- Exacto Knife or Box Cutters (you can get away with just the scissors)
- Paper Cutter (you can always just use the scissors on the paper)
Start with a Printer Paper Box
This was actually where I got lucky. A printer paper box is the perfect size to fit four rows of cards with some extra room on the sides. The box is big enough that when you cut down the sides you automatically have some scraps to make the row dividers out of. If you feel the need to, you can tape the sides for more strength. I suggest using the tape at the end though.
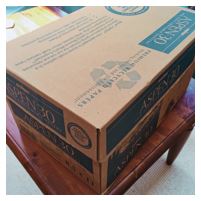
An ordinary printer paper box transforms into…
Cut the Box to Account for Cards Plus Taller Dividers
It’s time to cut the box. First, measure and mark the box for where you want to cut off the excess. I make my box height 5 inches. Mark 5 inches all the way around and then cut. A scissor can work here but it can be challenging (and give you carpel tunnel). This is where I find an exacto knife or box cutter works great.

Measure and cut your box with a five inch height.
Cut the Scraps to Create Dividers for Rows
The scraps you have become your row dividers. First, cut off the ends. Then cut the long sides in half. You should have about 4 1/4 inches of extra so half will be 2 1/8 inches. Try to measure it from the manufactured cut side rather than the side you cut as it will most likely be uneven. This cut is easy enough to make with the scissors and it probably more dangerous with the box cutter.

Create row dividers by cutting up the scraps from the sides.
Insert the Row Dividers into the Box
To get the dividers into the box you might need to take a little bit off then ends. You want it to be snug, but you don’t want it to bow. I just keep taking a little off and trying it as I go along. Once you have them cut, go ahead and tape them in. I usually tape the dividers up to try to make them smooth so I don’t damage my cards, but its probably unnecessary. You really just need to tape them in. When they get a bit old this is the part that gives way first but mine have lasted me a pretty long time so far. It can be tricky getting them in because there isn’t much space to move around.
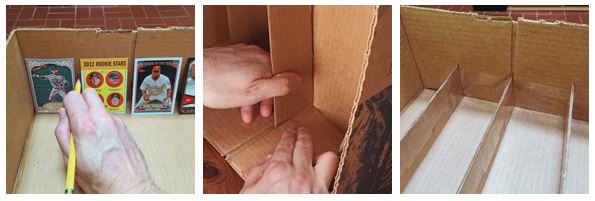
Four cards across fits perfectly.
Create Your Own Dividers
I also create my own dividers to split up each year, brand and set of cards. This is a simple MS Word template I developed. I cut the boxes high enough that these stick up a bit. That shows all the information on the divider. I usually have enough for four lines of information about the cards.
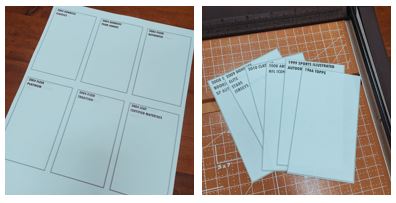
Create some dividers for inside the boxes.
Organize and Store Your Cards
The last step is loading them up. I find they work great to stack on shelves. While I’ve piled them four high before, I didn’t like it. It works best with two or maybe three high and I’m still trying to find a good shelving solution to fit the most boxes I can fit. I might have to plan for my own shelves.
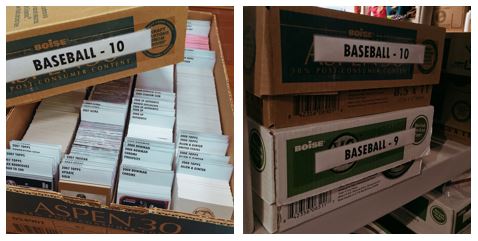
Let the organizing begin!
Thanks for visiting BravestarrCards.com: Card Collecting and TTM Autographs.
Giving this a try! Have built 2 so far.
Awesome! I’m glad its working out for someone else!
I dont have a printer paper box but I do have shipping supplies that the post office drops off at my door every month and I dont use even close to all of it. I’ll post some pictures when I’m done!